The Software Defined Radio (SDR) has become very popular in the radio hobby scene over the last few years. Many hobbyists own one, certainly most have heard of them. But what is an SDR, and why might you want one, over a traditional radio?
First, a very brief explanation of how the traditional superhetrodyne radio works. This is the type of radio you have, if you don’t have an SDR (and you don’t have a crystal radio).
Here’s a block diagram of a typical superhetrodyne receiver:
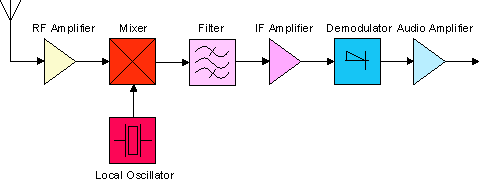
The antenna is connected to a RF amplifier, which amplifies the very weak signals picked up by the antenna. Some high end radios put bandpass filters between the antenna and RF amplifier, to block strong out of band signals which could cause mixing products and images.
Next, the signals are passed to a mixer, which also gets fed a single frequency from the local oscillator. A mixer is a non linear device that causes sum and difference frequencies to be produced. I won’t go into the theory of exactly how it works. The local oscillator frequency is controlled by the tuning knob on the radio. It is offset by a fixed amount from the displayed frequency. That amount is called the IF frequency. For example, the IF of an radio may be 455 kHz. Time for an example…
Say you’re tuned to 6925 kHz. The local oscillator generates a frequency of 6470 kHz, which is 455 kHz below 6925 kHz. The mixer mixes the 6470 kHz signal with the incoming RF from the antenna. So the RF from a station transmitting on 6925 kHz gets mixed with 6470 kHz, producing a sum (6925+6470=13395 kHz) and difference (6925-6470=455 kHz) signal. The IF Filter after the mixer only passes frequencies around 455 kHz, it blocks others. So only the difference frequencies of interest, from the 6925 kHz station, get paseed. This signal is then amplified again, fed to a demodulator to convert the RF into audio frequencies, and fed to an audio amplifier, and then the speaker. The IF filter is what sets the selectivity of the radio, the bandwidth. Some radios have multiple IF filters that can be switched in, say for wide audio (maybe 6 Khz), and narrow (maybe 2.7 kHz). Perhaps even a very narrow (500 Hz) filter for CW.
This is a very basic example. Most higher end HF radios actually have several IF stages, with two or three being most common. The Icom R-71A, a fairly high end radio for its time (the 1980s) had four IF stages. Additional IF stages allow for better filtering of the signal, since it is not possible to build real physical filters with arbitrary capabilities. There’s a limit to how much filtering you can do at each stage.
Now, onto the SDR. I’ll be describing a Direct Digital Sampling (DDS) style SDR. The other style is the Quadrature Sampling Detector (QSD), such as the “SoftRock” SDR. The QSD SDR typically mixes the incoming RF to baseband, where it is then fed to the computer via a sound card interface for processing. The main advantage of the QSD SDR is price, it is a lot cheaper due to fewer components. The sacrifice is performance and features. You can’t get more than about 192 kHz bandwidth with a sound card, and you suffer from signal degradation caused by the sound card hardware. Some try to compensate for this by buying high end sound card interfaces, but at that point you’re approaching the price point of a DDS SDR in total hardware cost anyway.
Here is a block diagram of the SDR-IQ, courtesy of RF Space, you can click on it to see an enlarged image.

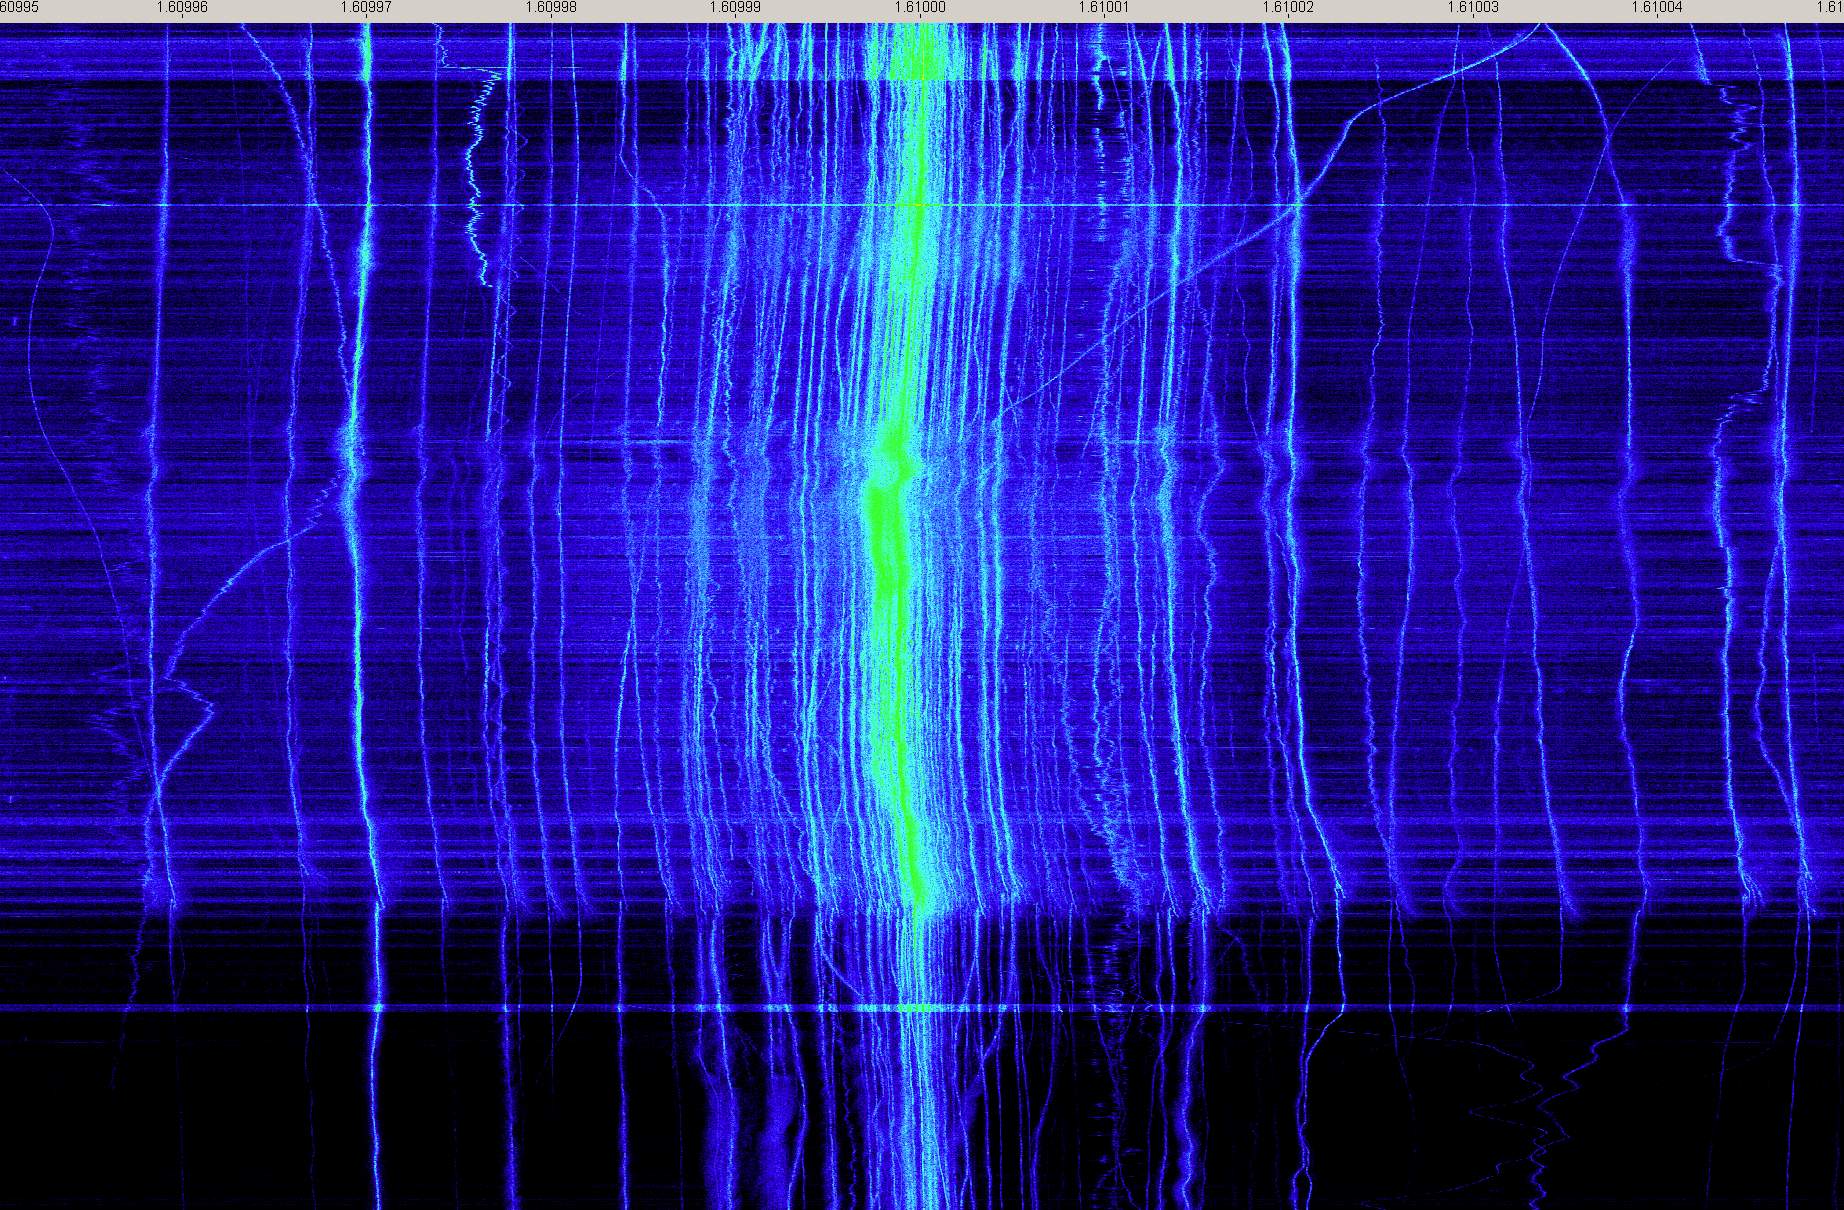
The RF input (from the antenna) goes in at the left end, much of the front end is the same as a traditional radio. There’s an attenuator, protection against transients/static, and switchable bandpass filters and an amplifier. Finally the RF is fed into an A/D converter clocked at 66.666 MHz. An A/D (Analog to Digital) Converter is a device that continuously measures a voltage, and sends those readings to software for processing. Think of it as a voltmeter. The RF signals are lots of sine waves, all jumbled together. At a very fast rate, over 66 million times per second in this case, the A/D converter is measuring the voltage on the antenna. You’ve got similar A/D converters on the sound card input to your computer. The difference is that a sound card samples at a much lower rate, typically 44.1 kHz. So the A/D in an SDR is sampling about a thousand times faster. It is not too much of a stretch to say that the front end of an SDR is very similar to sticking an antenna into your sound card input. In fact, for many years now, longwave radio enthusiasts have used sound cards, especially those that can sample at higher rates such as 192 kHz, as SDRs, for monitoring VLF signals.
The output of the A/D converter, which at this point is not RF but rather a sequence of voltage readings, is fed to the AD6620, which is where the actual DSP (Digital Signal Processing) is done. The AD6620 is a dedicated chip for this purpose. Other SDRs, such as the netSDR, use a device called a FPGA (Field Programmable Gate Array), which, as the name implies, can be programmed for different uses. It has a huge number of digital logic gates, flip flops, and other devices, which can be interconnected as required. You just need to download new programming instructions. The AD6620 or FPGA does the part of the “software” part of the SDR, the other part being done in your computer.
The DSP portion of the SDR (which is software) does the mixing, filtering, and demodulation that is done in analog hardware in a traditional radio. If you looked at a block diagram of the DSP functions, they would be basically the same as in a traditional radio. The big advantage is that you can change the various parameters on the fly, such as IF filter width and shape, AGC constants, etc. Automatic notch filters become possible, identifying and rejecting interference. You can also realize tight filters that are essentially impossible with actual hardware. With analog circuitry, you introduce noise, distortion, and signal loss with each successive stage. With DSP, once you’ve digitized your input signal, you can perform as many operations as you wish, and they are all “perfect”. You’re only limited by the processing power of your DSP hardware.
Since it is not possible feed a 66 MHz sampled signal into a computer (and the computer may not have the processing power to handle it), the SDR software filters out a portion of the 0-30 MHz that is picked up by the A/D by mixing and filtering, and sends a reduced bandwidth signal to the computer. Often this is in the 50 to 200 kHz range, although more recent SDRs allow wider bandwidths. The netSDR, for example, supports a 1.6 MHz bandwidth.
With a 200 kHz bandwidth, the SDR could send sampled RF to the computer representing 6800 to 7000 kHz. Then additional DSP software in the computer can further process this information, filtering out and demodulating one particular radio station. Some software allows multiple stations to be demodulated at the same time. For example, the Spectravue software by RF Space allows two frequencies to be demodulated at the same time, one fed to the left channel of the sound card, and one to the right. So you could listen to 6925 and 6955 kHz at the same time.
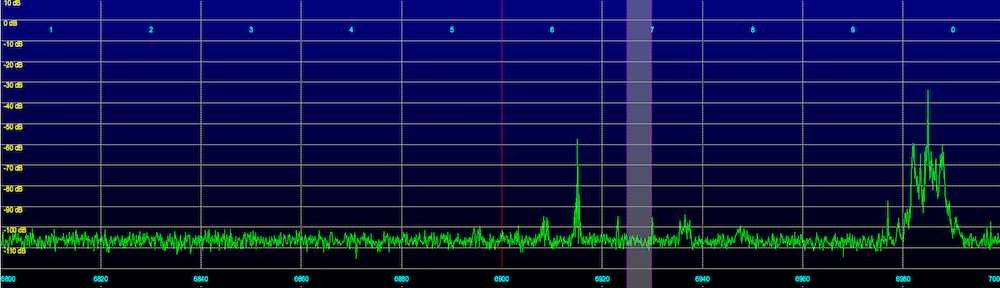
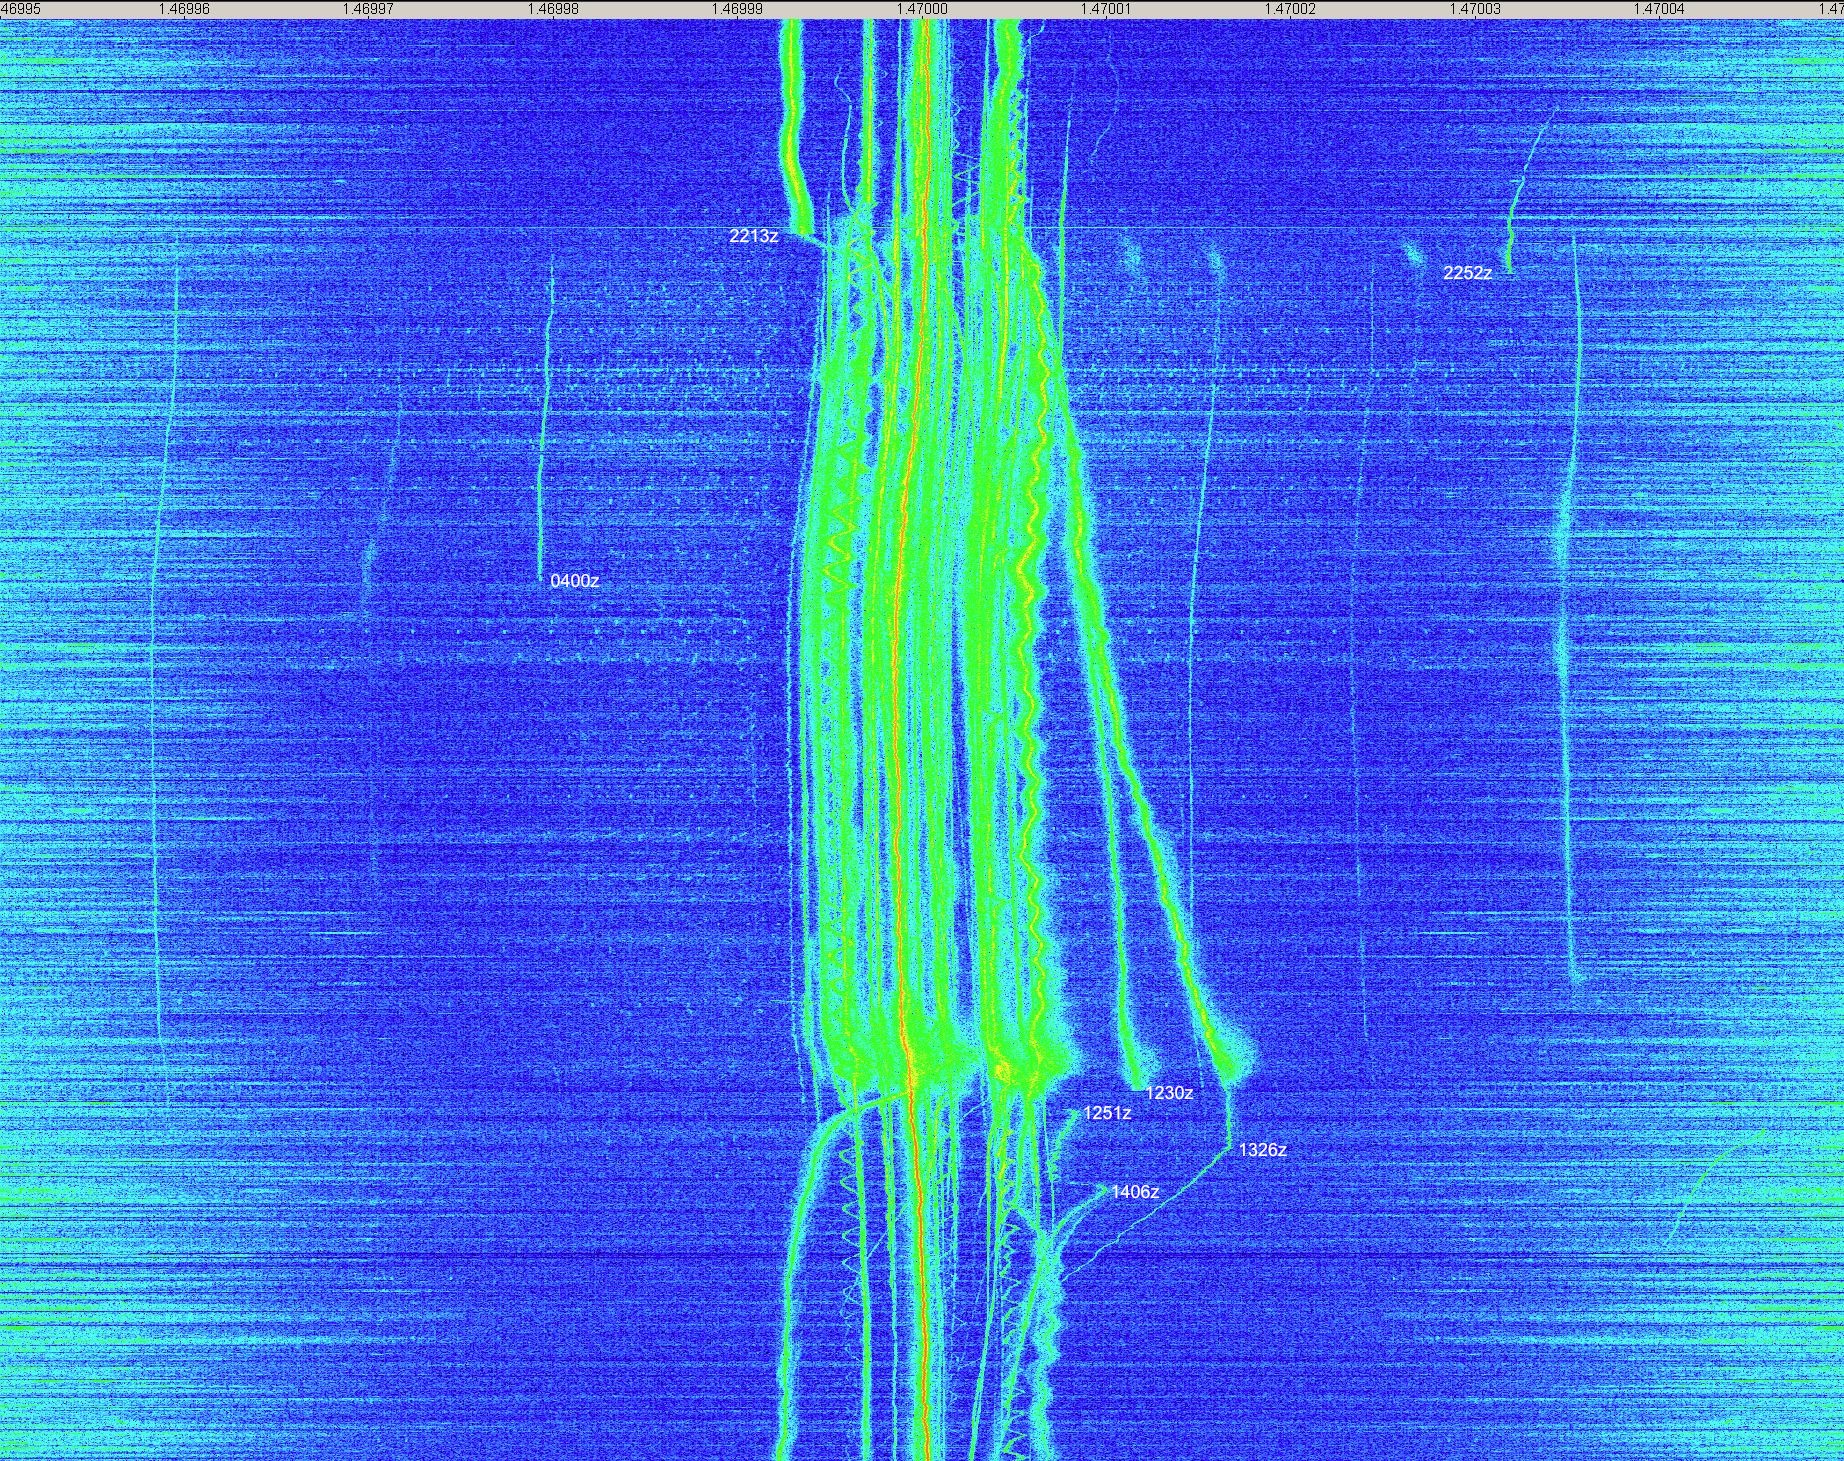
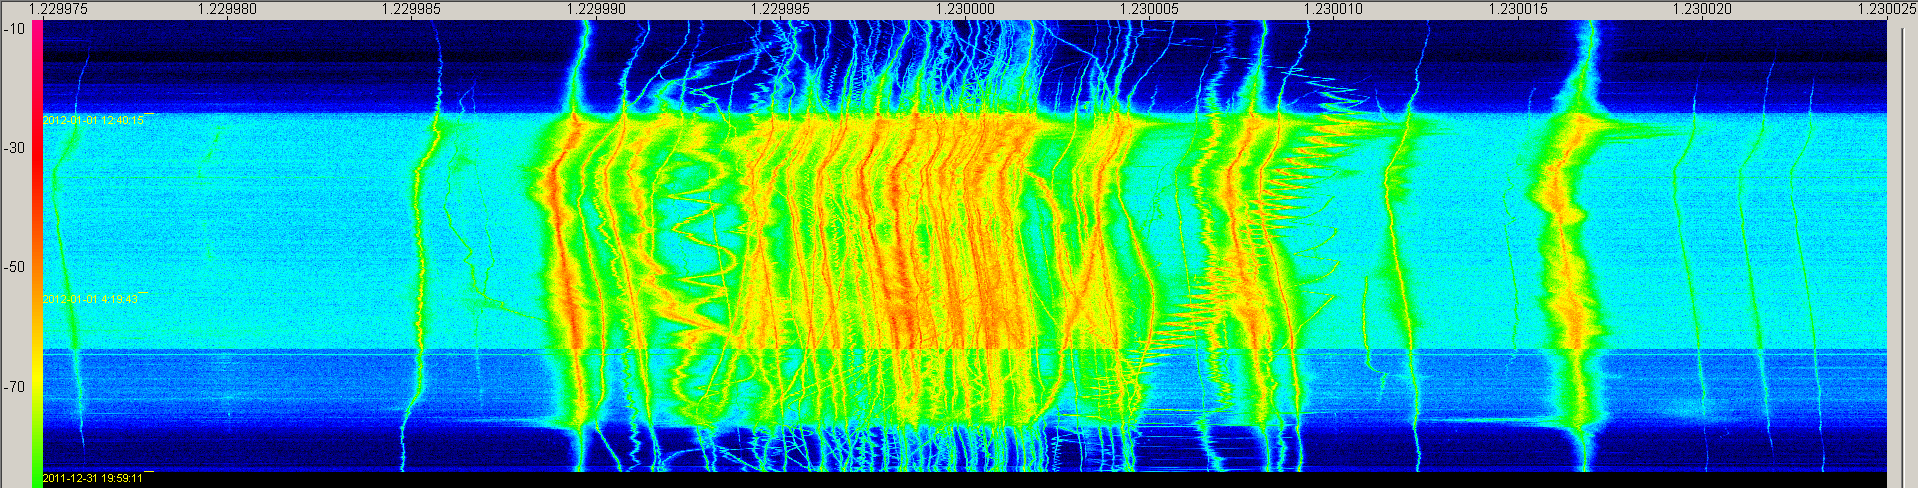
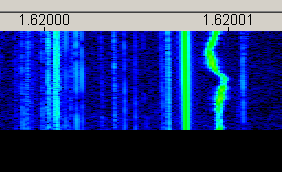
Another obvious benefit of an SDR is that you can view a real time waterfall display of an entire band. Below is a waterfall of 43 meters at 2200 UTC (click on it to enlarge):
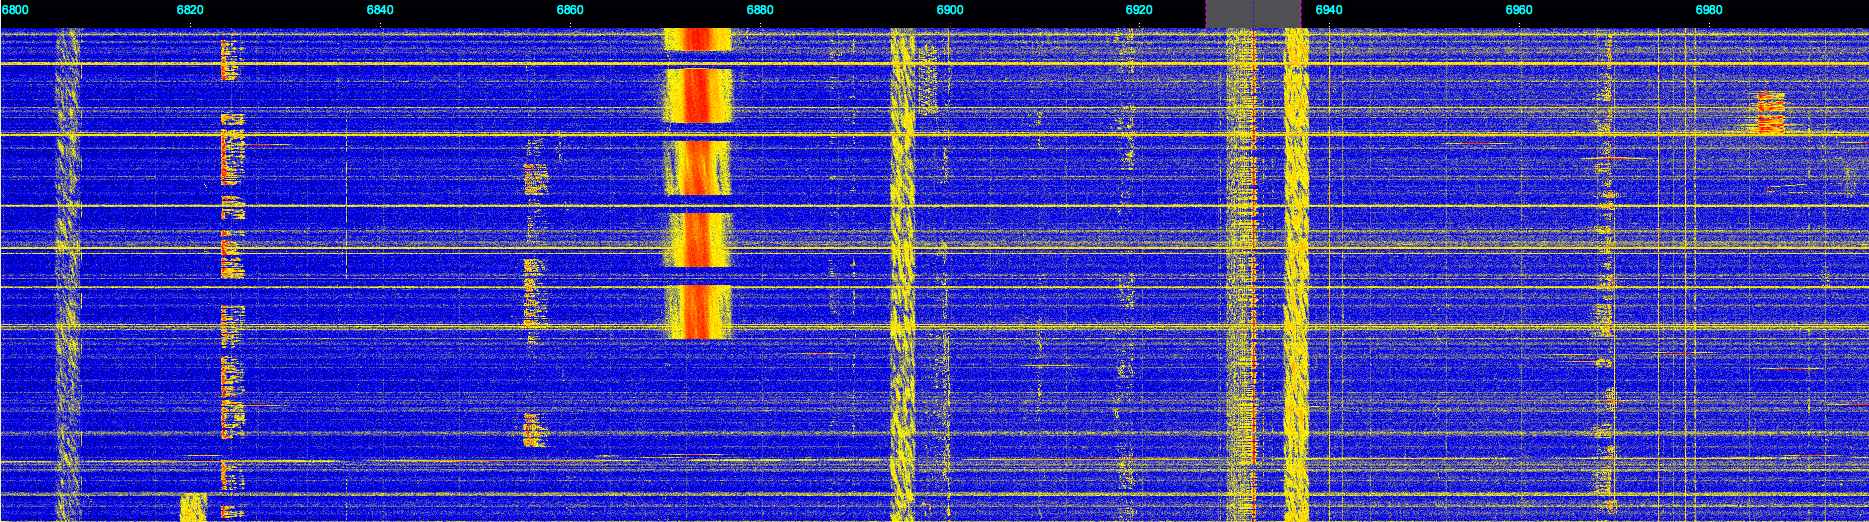
You can see all of the stations operating at one glance. If a station goes on the air, you can spot it within seconds.
Finally, an SDR allows you to record the sampled RF to disk files. You can then play it back. Rather than just recording a single frequency, as you can with a traditional radio, you can record an entire band. You can then go back and demodulate any signals you wish to. I’ll often record 6800 to 7000 kHz overnight, then go back to look for any broadcasts of interest.
For brevity, I avoided going into the details of exactly how the DSP software works, that may be the topic of a future post.
And yes, I borrowed the “What’s All this… Stuff, Anyhow” title from the late great Bob Pease, an engineer at National Semiconductor, who wrote a fabulous series of columns under that title at EDN magazine for many years.